Monday, May 30, 2011

Monty Carlos

Im going to be honest, I cant take responsibly for making these, it was mostly boyfriends doing. I had to share them because they were just too good looking and too darn yummy not to.

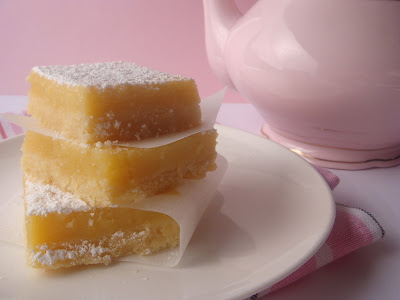
They turned out beautifully, everything a home made cookie should be, generously sized and perfect with a cup of tea.


Monte Carlos (from women's weekly, afternoon tea)

For the cookie
185 grams unsalted butter (softened)
1 teaspoon vanilla extract
1/2 cup firmly packed brown sugar
1 egg
1 1/4 cups self raising flour
3/4 cup plain flour
1/2 cup desiccated coconut
1/2 cup raspberry jam

For the cream filling
60grams unsalted butter (softened)
3/4 cup icing sugar
1/2 teaspoon vanilla extract
2 teaspoons milk

To make the cookie- Preheat the oven to 180 degrees c. Grease or line baking trays with baking paper.

Beat together butter, sugar and extract in a bowl until light and fluffy. Add the egg and continue mixing until combine.

Stir through the flour and coconut.

Shape level tablespoons of the mix into ovals, place on the prepared trays about 4 cm apart. ( the book said level teaspoons, but tablespoons made a more home-style sized cookie). Rough up the tops of the cookies with a fork.

Bake the cookies for about 12 minutes until golden brown. Allow to cool while making cream filling.

Spread half the cookie bases with jam and the other half with cream filling.

Sandwich the halves together.

To make the cream filling- Beat the butter and sugar until pale and fluffy, add the vanilla and milk and continue beating until smooth.

Running with Glitter

Tuesday, May 24, 2011

Robot Cake

Happy Birthday Rory!

Little kids get the best themed birthday parties! Robots are so cool.
This is just another short picture post, sharing the robot birthday cake I got to make over the weekend.

The idea for this cake came from an awesome robot themed cake and party by Blue Cupcake.

The cake was a vanilla butter cake, with a vanilla buttercream frosting. The robots were cut from ready to roll fondant and pressed into the buttercream. The cake didn't end up quite as tall as I was hoping, so the robots got a little shorter to fit.

Sadly I didn't make it to the party, but I hear the cake was a big hit. Thanks very much Sally for getting me an inside picture.

Friday, May 20, 2011

Mint-Chocolate Cheesecake Slice

Why is it I always impulse buy cook books on days that I have no money? While standing in line at the grocery store I grabbed a new Women's Weekly book, Little Squares and Slices. There are so many recipes I cant wait to try, I'm almost considering working through it start to finish, one slice a week.

I couldn't decide which one to try first, so I made boyfriend choose and he chose wisely, picking the mint-choc cheesecake slice from the cover. They are some yummy cheesecake squares, in fact I'm eating one of the last squares right now. Its very quick and easy to make, not counting the chilling time. I've never the biggest fan of cheesecakes but the mint hides the cheese flavour just enough, without completely taking over.

I have yet to dig the food processor out of the cupboard, it has been buried somewhere since we moved 2 years ago, so instead of processing the cookie base I placed the cookies in a clip-lock bag and crushed them. The only significant change i made to the recipe was not using mint liqueur, I didn't have any so substituted peppermint flavoring and a little green food dye to give it a pretty colour.

For the base
250 grams (8 ounces) plain chocolate biscuits (I used double choc-chip)
120 grams (4 ounces) butter, melted

For the filling
3 teaspoons gelatine
2 tablespoons water
500 grams (1 pound) cream cheese, softened
1/2 cup caster sugar
1 1/2 cups thickened cream
1/4 cup mint flavoured liqueur ( I used 1 1/2 tablespoons peppermint flavouring and a few drops of green food colour)

For the Chocolate Glaze
185 grams (6 ounces) dark eating chocolate, coursely chopped
50 grams (1 1/2 ounces butter)

To make the base- grease a 20 by 30 cm (8 inch -12 inch) and line with baking paper leaving some overhang on the sides.

Process the biscuits until fine, add the butter and process until it comes together (or mix crumbs and butter in a bowl until combined).

Press the cookie mixture in an even layer over the base of the lined pan, refrigerate of 30 minutes. While the base is chilling make the filling.

To make the filling- Sprinkle the gelatine over the water in a small heatproof jug. Stand the jug in a pot of shallow simmering water, stir the water and gelatine until dissolved. Allow to cool 5 minutes.

Beat the cream cheese and sugar until smooth, add the cream and continue beating until the mix is smooth and slightly thickened. Stir in the gelatine mix and mint liqueur (or flavouring).

Spoon the filling over the prepared base and smooth over, place in the fridge and chill until set, or over night.

Once set make and pour over the chocolate glaze, chill until chocolate glaze is set before cutting into squares. (A hot knife helped to cut through the chocolate.)

To make the chocolate glaze- place butter and chocolate in a small heatproof bowl, place bowl over a small pot of simmering water, stir until smooth and combined.

Enjoy!!

Sunday, May 15, 2011

Elephant Cookies

This is just a quick post to share some pictures.

I have been so lucky these past few weeks, I've got to make a whole bunch of fun cookies. I'm pretty sure these are my favorites, the little elephants are just so darn cute.
These cookies were a request for a little boy's first birthday party, I was even more excited about making them after seeing the adorable invitation. I love the baby elephants so much, I'm thinking about making some more just for myself, imagine little pink and blue elephants with hearts and kisses.
Once again the cookies were shortbread with vanilla royal icing. I had a hard time finding a light green in edible glitter, so used a combination of sea green and lush lime to get the right colour. This was my first time using glitter, I can already tell its going to take a lot of self control not to cover everthing I make with it.
Happy First Birthday Hunter!
Running with Glitter

Wednesday, May 11, 2011

First Blogiversary & Flower Pot Cupcakes

Yay! today is my one year blogiversery! Crazy! I can't believe I've been doing this for 12 whole months.

Its been a fantastic first year! I've had so much fun baking and sharing a whole bunch of goodies. To all the people who have read, followed or left comments I cant thank you enough, reading your lovely words of encouragement always brighten my day.

This last week has been one of the most exciting, I received my first real out of blog-world mention, a feature about my blog in the Food and Wine section in the Canberra times ( Thank you Rosslyn Beeby, I was smiling for days!) Not to mention getting to make some really cute cupcakes and cookies.

I have loved every part of this first year and can only hope for the same this next year. Thanks again for everyones support. I decided to start this year off just as I did the last, sharring with you the recipe for my mothers day goodies.

I hope you continue to enjoy reading my blog as much as I have enjoyed posting.
To make the fondant flower pots-
Start with 250 grams white fondant, divide into 6 portions.
-colour 2 portions terracotta orange
-colour 1 portion green
-colour 1 portion light pink
-colour 1 portion dark pink
-leave 1 portion white (to roll out for garden gates)

Roll the green fondant out to 3mm thick. Cut out the shapes for the leaves (four for each flower pot), I used a daisy flower cutter and cut off the petals. Use a knife to press in the lines on the leaves.

Brush the ends of four leaves with a tiny bit of water, gently press each onto the top of the pot, allowing half to hang over the edge.
Roll some of the pink fondants into small balls, about half the size of the top of the pots.

Brush the bottom of the ball with a tiny bit of water, secure onto the centre on the pot (on top of the leaves).
Roll out the both of the pink portions of fondant to 3mm thick. Using a small flower cutter cut out the flowers (6 for each pot). Press a small indent into the middle of each flower, press in yellow sprinkle centre.

Brush a little water onto the back of each flower, press one onto the top of the pink ball.
Continue pressing the remaining 5 flowers around the sides to create the little flower bush.
Admire your cute little flower pots!

For the cupcakes (adapted from Woman's weekly, Easy Cupcakes by Colour, Vanilla Cupcakes)
3 cups self-raising flour
270 grams softened butter
1 teaspoons vanilla extract
1 1/2 cups caster sugar
6 eggs
3 tablespoons milk
3 tablespoons lemon juice
2 tablespoons lemon zest

To make the cupcakes- (makes 32) preheat the oven to 180°c. Line muffin pans with cupcake papers.

Sift the flour into a large mixing bowl, add the butter, vanilla, sugar, eggs, zest, lemon juice and milk. Beat all the ingredients on low speed until just combined, increase the speed to medium and continue beating until mixture is light in colour and increased in volume.

Spoon the mixture into prepared cupcake pans, filling them about 3/4 full.

Bake the cupcakes for about 20 minutes, until golden and springy. Remove from oven and allow to sit for 5 minutes in the pans before standing the cakes on a wire rack to cool completely.

For the Lemon Buttercream
200 grams butter (softened)
4-5 cups icing sugar
2 tablespoons lemon zest
3 tablespoons lemon juice
3 tablespoons milk
Food colour gels

To make the icing
- beat the butter in a medium bowl until it is as lightly coloured as possible before adding the icing sugar and lemon zest.
Gradually add the juice and milk until the buttercream reaches pipe-able consistency.

Divide the buttercream into 3 smaller bowls and dye desired colours. Using a large star tip pipe swirls of buttercream onto each of the cupcakes.
Top the cupcakes with flower pots, garden gates and royal icing polka dots.
Enjoy!
(Sorry for editing this again, I'm having some layout troubles)

Sunday, May 8, 2011

Happy Mothers Day

I hope everyone had a lovely mothers day yesterday, spoiling your mum
or being spoilt yourself.

My mum was working on mothers day, so boyfriend and I surprised her at her nursery with a tea party of cupcakes and cookies.

I had so much fun making these, when I get a little more free time I'll post the cupcake recipe and step by step guide on how to make the little fondant flower pots and garden fences.


.

.

Thursday, May 5, 2011

Lemon Squares

This is my second attempt at lemon squares, the first time I tried to make them was pretty much a disaster. I baked the crust and then added the filling as instructed and baked for the time the recipe said. The filling just wouldn't set, so I baked it some more and some more and some more again. After baking it for over twice as long as in the recipe, I figured maybe putting it in the fridge overnight might help. No luck!, as I attempted to cut the slice into squares the next morning the lemon filling oozed all over my bench. It tasted great but it was a mess!

This time I used a Martha Stewart recipe (altered a teensy bit) and they worked out perfectly! Not only tasting great, but looking good. The shortbread base turned out buttery and crumbly and was oh so yummy with the sweet lemon filling.

For the Crust

1 3/4 cups plain flour

12 tablespoons (1 1/2 sticks) butter (frozen)

3/4 cup confectioner's sugar (plus bit extra for dusting)

3/4 teaspoon salt


For the filling

4 large eggs (lightly beaten)

1/4 cup milk

4 tablespoons plain flour (Martha says 3)

1 1/3 cups sugar

3/4 cup freshly squeezed lemon juice (Martha says 3/4)

1 tablespoon lemon zest (not in original recipe)

1/4 teaspoon salt

To make the crust- Preheat oven to 180 degrees c. and grease a 9-by-13-inch baking pan, line with baking paper.

Grate butter with a large hole grater. Whisk together flour, confectioners' sugar, and salt in a large bowl. Add the grated butter and stir with a wooden spoon until combined and mixture looks crumbly. Rub any remaining clumps of butter in with fingertips.

Tip the mixture into the prepared baking pan. Press into an even layer with your hands, leaving a slightly higher lip on the very edges. Place the crust in freezer for 15 minutes. Bake 16 to 18 minutes, until slightly golden. While the base is baking prepare the filling.

To make the filling- Whisk together eggs, sugar, flour, and salt in a large measuring cup or jug until smooth. Stir in lemon juice and milk.

To make the slice- remove crust from the oven and immediately pour filling mixture over hot crust. Turn down oven to 160 degrees c, and bake until filling is set and edges are slightly golden brown, about 18 minutes. Allow to cool completely on a wire rack before cutting.

Remove the slice from the pan using the baking paper, dust the top with confectioners' sugar and cut into squares.

Enjoy!


Tuesday, May 3, 2011

Butter Hearts Sugar on Facebook


My blog now has a facebook. I have never ever used facebook before, I know i'm so far behind. Its all new to me and a bit scary I don't really know what to do, so no laughing if I'm a facebook spaz.